
Allow your users to login to your ASP.NET Core app through Facebook
Published: Wednesday 23 September 2020
ASP.NET Core makes it easy to allow your users to login to your application through Facebook.
- Being able to capture personal details from a users Facebook account, such as name and email
- Users not having to fill out another form to sign up for something
I personally like the fact that when you can log in through Facebook, it just makes the whole process quicker than usual.
So, How Do I Setup an App in Facebook?
Well you need a Facebook account, but you probably already knew that.
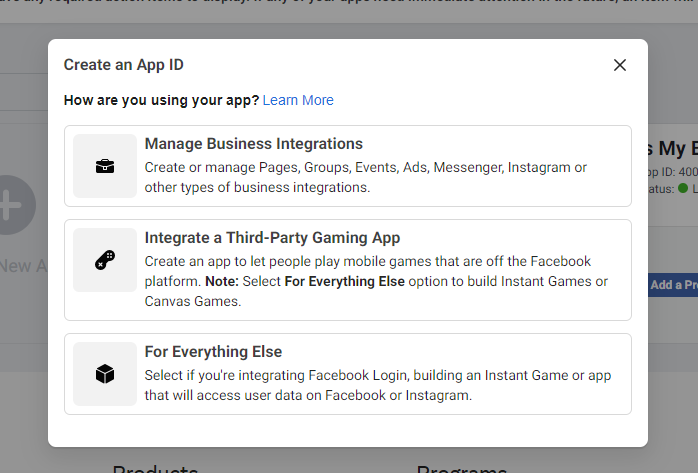
When creating an app in Facebook, select "For Everything Else"
You will then need to give it a Display Name and a Contact Email.
I Created The App. How Do I Integrate Facebook Login?
Now that you have created your app, you are greeted with a list of products that you can integrate with your Facebook app. You will need to set up the Facebook Login product.
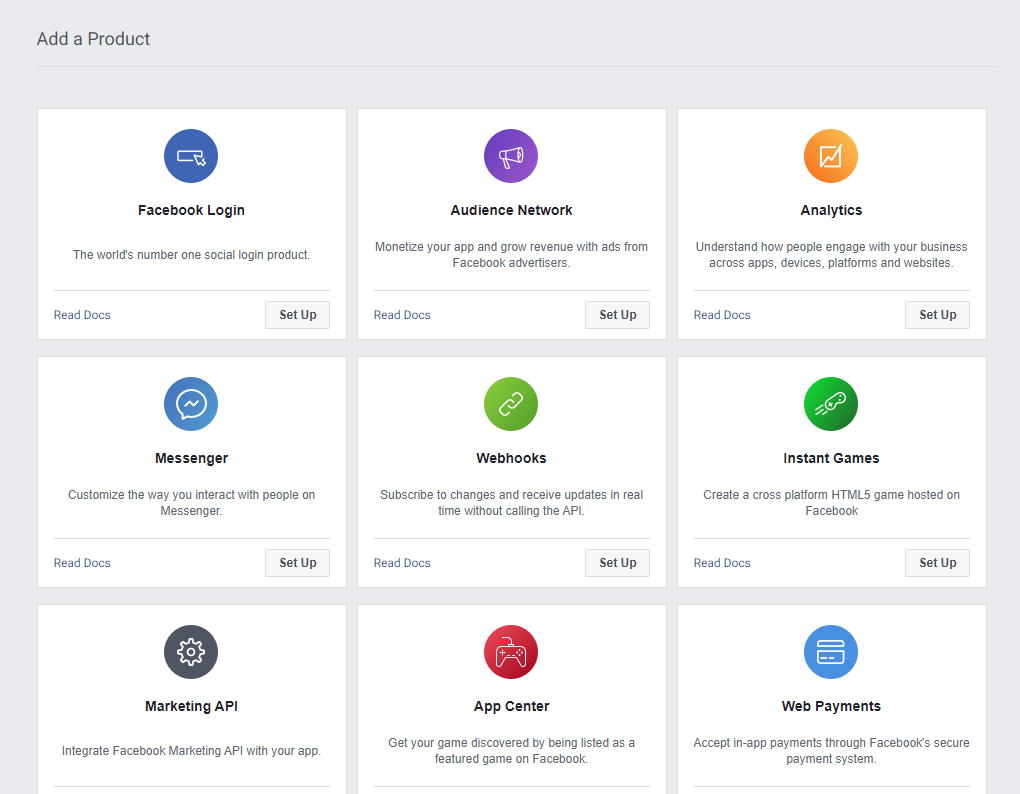
Set Up Facebook Login when you have created your Facebook app
At this point, a Facebook Login link will appear on the left-hand side menu. Go ahead and click on Settings.
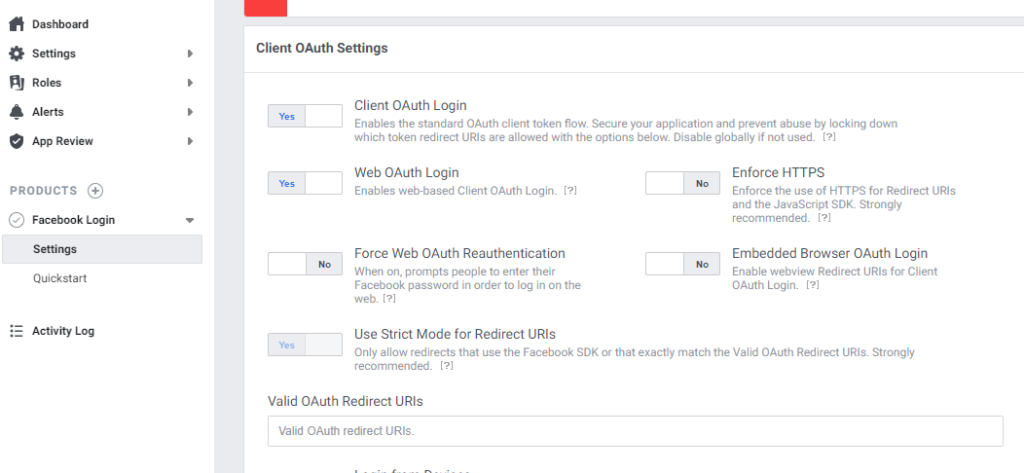
Click on Settings under Facebook Login on the left hand side. Then set the Valid OAuth Redirect URI with https://{your_host}/signin-facebook
Save the changes. Now you need to get your Facebook App Id & Secret.
How do I Integrate My Facebook App into my ASP.NET Core App?
I recommend setting up an ASP.NET Core MVC project in Visual Studio to follow this as we are going to use the default project that it creates for us.
Install-Package Microsoft.AspNetCore.Authentication.FacebookThis package will contain all the functionality required to set up Facebook authentication.
Setting the App Id and Secret
We now need to configure our ASP.NET Core application to set up Facebook authentication. In-order to do this, we need to make some changes to our Startup class.
// Startup.cs
public class Startup
{
	...

	// This method gets called by the runtime. Use this method to add services to the container.
	public void ConfigureServices(IServiceCollection services)
	{
		services.AddAuthentication(options =>
		{
			options.DefaultScheme = CookieAuthenticationDefaults.AuthenticationScheme;
		})
		.AddCookie(options =>
		{
			options.LoginPath = "/account/facebook-login"; // Must be lowercase
		})
		.AddFacebook(options =>
		{
			options.AppId = "1066....";
			options.AppSecret = "Bm....";

		...

	}

	// This method gets called by the runtime. Use this method to configure the HTTP request pipeline.
	public void Configure(IApplicationBuilder app, IWebHostEnvironment env)
	{
		...

		// Must be before UseEndPoints
		app.UseAuthentication();
		app.UseAuthorization();

		...
	}
}
The first thing we do is call AddAuthentication and set up a default scheme. We will use the CookieAuthenticationDefaults scheme as the default.
How to Require Authorisation to a Page?
We are going to require authorisation to the actions inside HomeController.cs. For that, we can use the [Authorize] attribute, which can be replaced as a class declaration. This means that all actions that sit in HomeController will require to be authorised.
/ HomeController.cs
[Authorize]
public class HomeController : Controller
{
	...

	[AllowAnonymous]
	public IActionResult Index()
	{
		return View();
	}

	...
}
Now to Add the Login and Response Actions
We are going to create a new Account controller. This controller will contain two methods.
// AccountController.cs
[AllowAnonymous, Route("account")]
public class AccountController : Controller
{
	[Route("facebook-login")]
	public IActionResult FacebookLogin()
	{
		var properties = new AuthenticationProperties { RedirectUri = Url.Action("FacebookResponse") };
		return Challenge(properties, FacebookDefaults.AuthenticationScheme);
	}

	[Route("facebook-response")]
	public async Task<IActionResult> FacebookResponse()
	{
		var result = await HttpContext.AuthenticateAsync(CookieAuthenticationDefaults.AuthenticationScheme);

		var claims = result.Principal.Identities
			.FirstOrDefault().Claims.Select(claim => new
		{
			claim.Issuer,
			claim.OriginalIssuer,
			claim.Type,
			claim.Value
		});

		return Json(claims);
	}
}
For your information, we've added an [AllowAnonymous] to the AccountController at class level. This is so you don't need authentication to view the methods in this controller.
I Still Can't This To Work
Watch our video coding tutorial.
It's This Easy with Other Social Media Platforms
Regular readers to Round The Code may find that this is very similar to my article How to Add Google Authentication to a ASP.NET Core Application.
Related tutorials
What is Basic authentication and how to add in ASP.NET Core
Learn what is Basic authentication and an example of how to add it to a HTTP request header in ASP.NET Core using Base64.
What is JWT and how to add it to ASP.NET Core
How to use JWT in ASP.NET Core for Bearer token authentication and security within the OAuth Client Credentials flow.