

Click on the Configure Consent Screen button and following the next steps:
- For User Type, select External
- Give it an Application Name
By default, Google will expose the email, profile and openid scopes. If we wish to add more, then we can click on the Add Scope button.
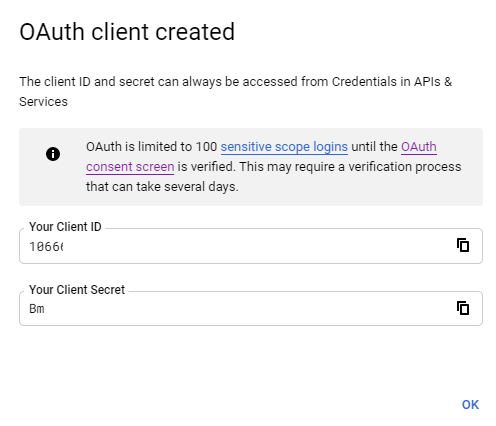
OAuth Crendentials
We will now be able to set up the OAuth Client ID. We can do that with these steps:
- Click on the menu icon in the top-left hand side of the page. Navigate to API & Services and click on Credentials
- Click on the Create Crendentials button and select OAuth Client ID.
- For Application Type, select Web Application
- Give the application a Name if required
We will need to set an Authorised Redirect URI. This will need to be "{your_host}/signin-google". So if our web application is running securely on localhost:4000, the redirect URI would be "https://localhost:4000/signin-google".