How to use SignalR when receiving a message from a RabbitMQ queue in .NET Core
Published: Wednesday 28 August 2019
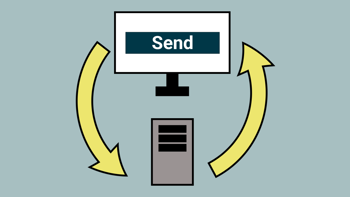
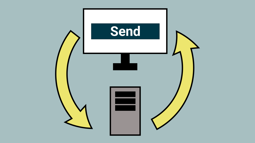
One of the things I faced the challenge of overcoming was using RabbitMQ and SignalR in-conjuction with one another.
I am building a ASP.NET Core application and want to consume a RabbitMQ queue when the application starts. When a message is published to that queue, it sends a message to all the clients connected through SignalR.
So how did I go about resolving this?
The Assumptions
This article assumes that you already have successfully added RabbitMQ and SignalR to your .NET Core application. But, if you need further assistance, these articles helped me:
The SignalR Hub
Setting up SignalR "Hub" if the first thing you need to do. The Hub is an abstract class in SignalR, and allows clients to be connected to it. Because of this, the Hub has the ability to send messages to all clients connected, or to a particular client. Here is an example of how to set one up:
// ChatHub.cs
using Microsoft.AspNetCore.SignalR;

namespace SignalRRabbitMQ_Example.Hubs
{
	public class ChatHub : Hub
	{

	}
}
You then have to configure that Hub in your .NET Core application. This is an example of it in .NET Core 3:
app.UseEndpoints(configure =>
{
	configure.MapHub<ChatHub>("/chatHub");
});
In earlier versions of .NET Core, you will use app.useSignalR syntax, but this has been depreciated as of version 3.
Consuming a RabbitMQ on Startup
The next thing to do is to consume a RabbitMQ when the application starts. In versions of .NET Framework, you could hack into a lifetime stage in the Global.asax file. So how can you do it in .NET Core?
Well it's a familiar story in .NET Core. In the startup.cs file, there is a Configure method. You can add "lifetime" as a parameter in that method. The "lifetime" parameter inherits IHostApplicationLifetime interface (IApplicationLifetime in versions of .NET Core prior to 3).
In the "lifetime" parameter, there is a delegate called ApplicationStarted. As you can guess, this gets executed once your application has started.
Then it's a case of creating a delegate and attaching it to ApplicationStarted. The delegate has a parameter of IServiceProvider. This allows the delegate to use Dependency Injection. The delegate gets a reference to IRabbitMQService which is a reference we created in Dependency Injection. IRabbitMQService has been set up as a single instance so we can refer to it when the application has started. We need this service so we have a reference to the RabbitMQ connection.
Inside the IRabbitMQService, there is a method called Connect. In this method, it consumes a queue in RabbitMQ. Upon receiving a message from that queue, it uses Dependency Injection to create a reference of the SignalR Hub we created. It's then a simple case of sending a message to all connected clients. Here is an example of Startup.cs:
// IRabbitMQService.cs
public interface IRabbitMQService
{
	void Connect();
}
// RabbitMQService.cs
public class RabbitMQService : IRabbitMQService
{
protected readonly ConnectionFactory _factory;
protected readonly IConnection _connection;
protected readonly IModel _channel;
protected readonly IServiceProvider _serviceProvider;
public RabbitMQService(IServiceProvider serviceProvider)
{
// Opens the connections to RabbitMQ
_factory = new ConnectionFactory() { HostName = "localhost" };
_connection = _factory.CreateConnection();
_channel = _connection.CreateModel();
_serviceProvider = serviceProvider;
}
public virtual void Connect()
{
// Declare a RabbitMQ Queue
_channel.QueueDeclare(queue: "TestQueue", durable: true, exclusive: false, autoDelete: false);
var consumer = new EventingBasicConsumer(_channel);
// When we receive a message from SignalR
consumer.Received += delegate (object model, BasicDeliverEventArgs ea) {
// Get the ChatHub from SignalR (using DI)
var chatHub = (IHubContext<ChatHub>)_serviceProvider.GetService(typeof(IHubContext<ChatHub>));
// Send message to all users in SignalR
chatHub.Clients.All.SendAsync("messageReceived", "You have received a message");
};
// Consume a RabbitMQ Queue
_channel.BasicConsume(queue: "TestQueue", autoAck: true, consumer: consumer);
}
}// Startup.cs
using System;
using Microsoft.AspNetCore.Builder;
using Microsoft.AspNetCore.SignalR;
using Microsoft.Extensions.Configuration;
using Microsoft.Extensions.DependencyInjection;
using Microsoft.Extensions.Hosting;
using RabbitMQ.Client;
using RabbitMQ.Client.Events;
using SignalRRabbitMQ_Example.Hubs;
namespace SignalRRabbitMQ_Example
{
public class Startup
{
public Startup(IConfiguration configuration)
{
Configuration = configuration;
}
public IConfiguration Configuration { get; }
// This method gets called by the runtime. Use this method to add services to the container.
public void ConfigureServices(IServiceCollection services)
{
services.AddSingleton<IRabbitMQService, RabbitMQService>(); // Need a single instance so we can keep the referenced connect with RabbitMQ open
services.AddSignalR();
}
// This method gets called by the runtime. Use this method to configure the HTTP request pipeline.
public void Configure(IApplicationBuilder app, IHostApplicationLifetime lifetime)
{
// Prior to .NET Core 3, IHostApplicationLifetime was actually IApplicationLifetime
// Add the ChatHub to the configuration. This has changed for .NET Core 3. Prior versions used app.AddSignalR at this stage
app.UseEndpoints(configure =>
{
configure.MapHub<ChatHub>("/chatHub");
});
// Run 'RegisterSignalRWithRabbitMQ' when the application has started.
lifetime.ApplicationStarted.Register(() => RegisterSignalRWithRabbitMQ(app.ApplicationServices));
}
public void RegisterSignalRWithRabbitMQ(IServiceProvider serviceProvider)
{
// Connect to RabbitMQ
var rabbitMQService = (IRabbitMQService)serviceProvider.GetService(typeof(IRabbitMQService));
rabbitMQService.Connect();
}
}
}Related tutorials
Using SignalR in ASP.NET Core & React to send messages
Integrating React TypeScript and ASP.NET Core to send messages. Create a MVC API Controller to send a POST request through JSON to use with SignalR.