How to create ASP.NET Core Web API CRUD methods
This tutorial will show you how to create an ASP.NET Core Web API in Visual Studio and how to create each of the CRUD methods (Create, Read, Update and Delete).
In-addition, we'll show you how to test each of them using Postman.
How to update Visual Studio
We are going to create an ASP.NET Core Web API using .NET 8. As a result, we need to make sure that our Visual Studio 2022 version is 17.8.0 or above.
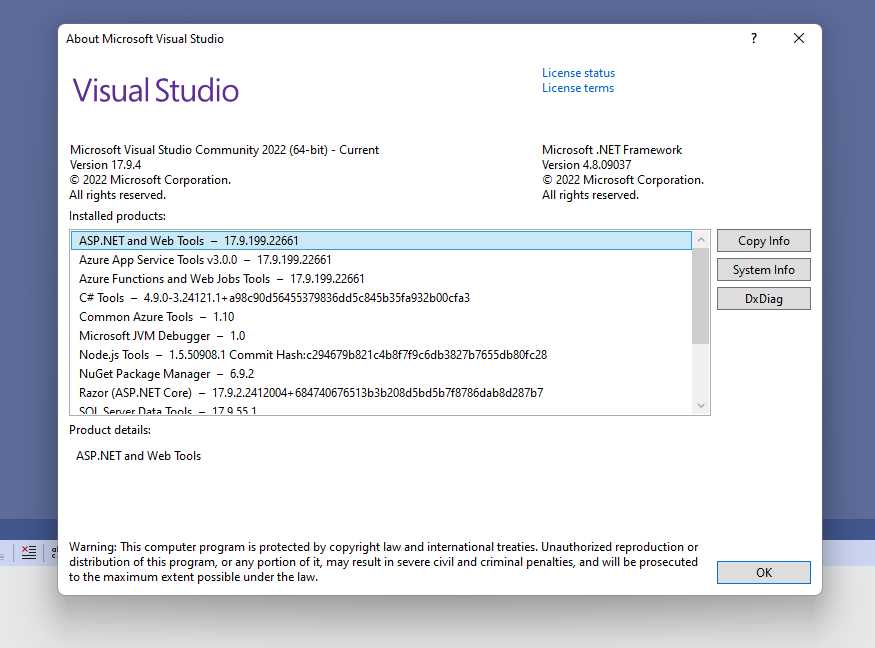
To find out the version installed, go to Help and About Microsoft Visual Studio.
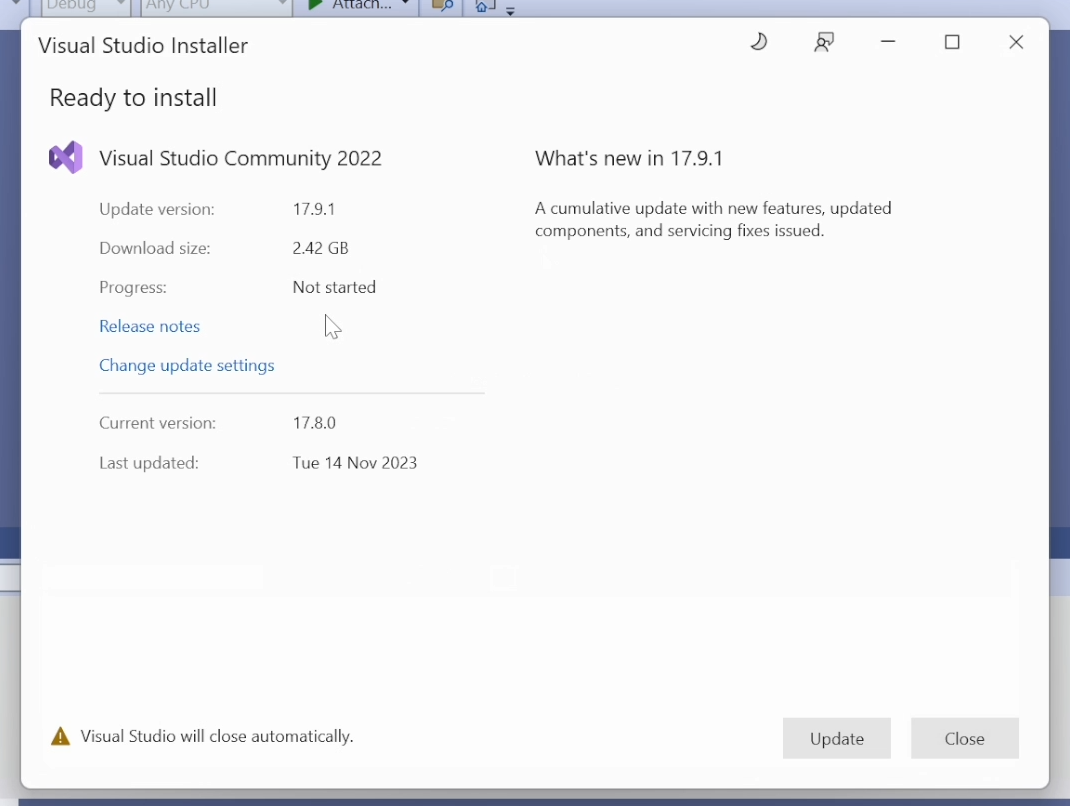
If it's below version 17.8.0, go to Help and Check for Updates. This will load up Visual Studio Installer and will allow for updating to the latest version.
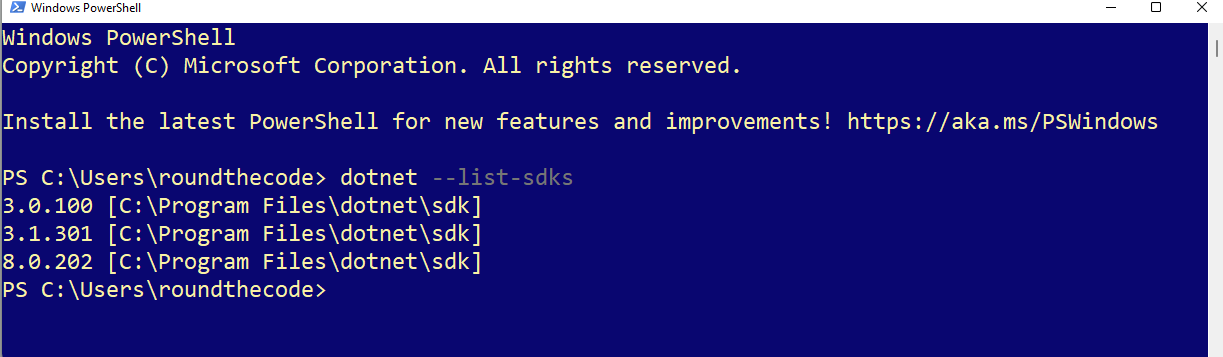
Updating Visual Studio should download the .NET 8 SDK. To check which versions of .NET are installed, open up a PowerShell or Command Prompt window and run:
dotnet --list-sdksIf there is a version that begins with 8 or above, then it should be good.
If it's not there, the SDK can be installed from Microsoft's website and is available for Windows, Linux and Mac. Just make sure to install to the SDK and not the runtime.
How to create an ASP.NET Core Web API in Visual Studio
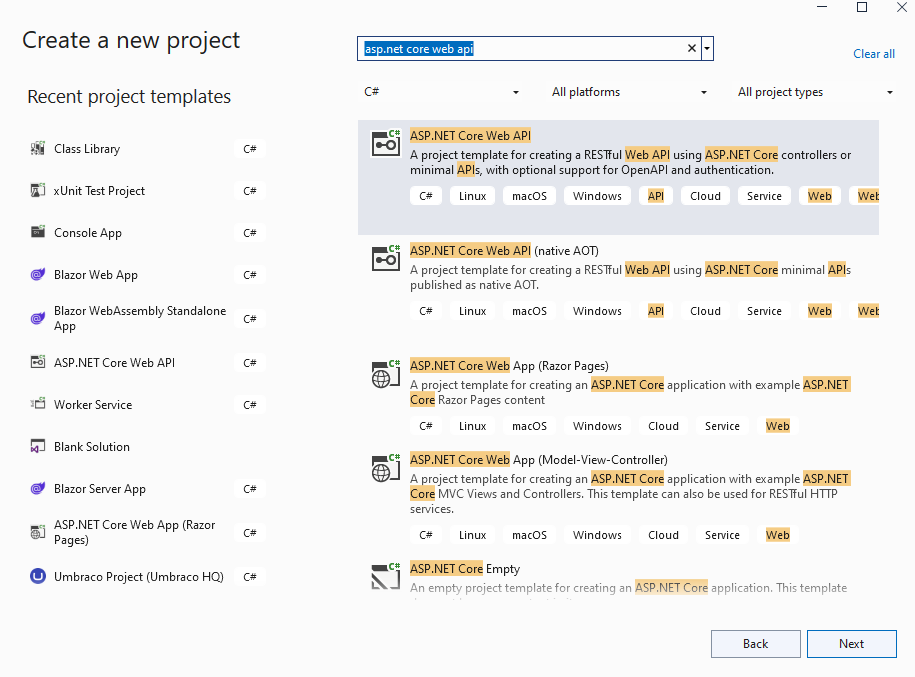
In Visual Studio, create a new project, and do a search for ASP.NET Core Web API. Select the C# template.
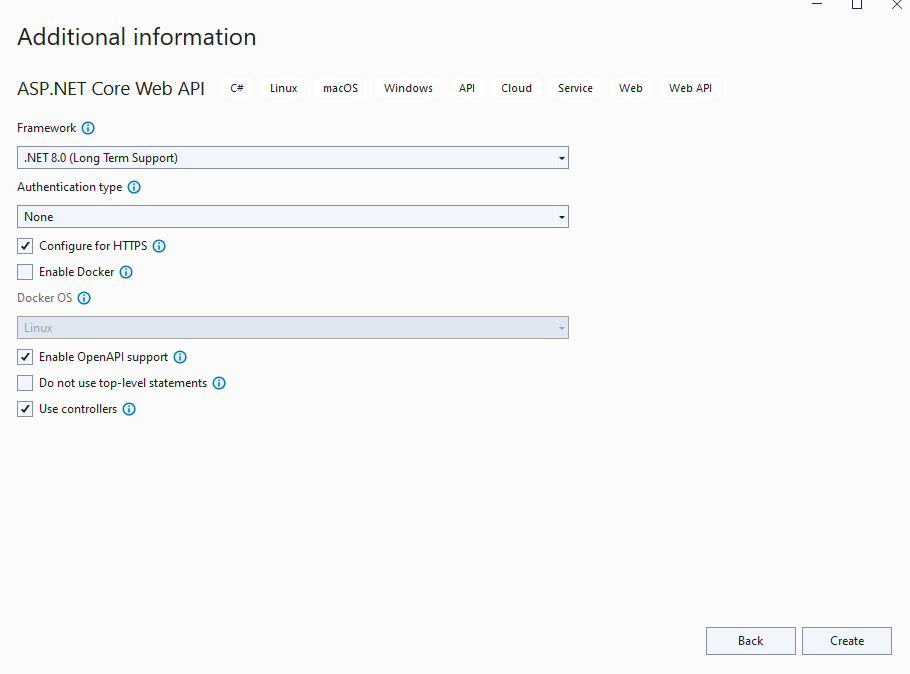
Go to the next step and enter a project name. All the other options should be able to be left the same.
Also make sure that for the framework that .NET 8.0 (Long Term Support) is selected.
Pressing the Create button will create the ASP.NET Core Web API.
If you're still a little unsure on how to create an ASP.NET Core Web API project, watch our video on how to do it.
We take you through the steps on how to update Visual Studio, download the SDK and create the project.
Create Web API CRUD methods
With the ASP.NET Core Web API project created, we can create an API controller class.
For this we are going to create a ProductController class.
// ProductController.cs
[Route("api/[controller]")]
[ApiController]
public class ProductController : ControllerBase
{

}
The class has two attributes assigned to it.
The Route attribute adds a route prefix to each of the endpoints contained in this controller. This is set as api/[controller]. The [controller] parameter will translate to the name of the controller, minus the name Controller.
As our controller is called ProductController, the route prefix will translate to api/product.
The ApiController attribute means that the controller behaves like an API controller rather than an MVC controller. There are some subtle differences between an API and MVC controller which is covered in our tutorial where we look at FromQuery and FromForm.
Read an entity
We can set up a new method in ProductController to read an object.
// ProductController.cs
[Route("api/[controller]")]
[ApiController]
public class ProductController : ControllerBase
{
	[HttpGet("{id}")]
	public IActionResult Read(int id)
	{
		return Ok(new { id, Name = "Dave" });
	}
}
This method returns an OkObjectResult type which allows us to return some data as part of the response. This will return a HTTP 200 OK response when the endpoint is run.
In-order to make this method an API endpoint, we have to add the HttpGet attribute to it. This includes an optional template parameter which routes the endpoint.
As we are passing in an id parameter into the method, we wish to include it in the route. This can be done by adding {id} into the route.
As the ProductController has a route of api/product, it means that the endpoint for the Read method will be /api/product/{id}.
Create an entity
Creating an entity works in a similar way to reading an entity. The only exception is replacing the HttpPost attribute.
This method returns a CreatedResult type which will return a HTTP 201 Created response. This allows to return a Uri and object as part of the response.
The HttpPost attribute does not have a template, so the endpoint for this method will be /api/product.
// ProductController.cs
[Route("api/[controller]")]
[ApiController]
public class ProductController : ControllerBase
{
	...

	[HttpPost]
	public IActionResult Create(WeatherForecast weatherForecast)
	{
		return Created(string.Empty, weatherForecast);
	}
}
Updating an entity
Updating an entity involves adding the HttpPut attribute to the method. As we want to know which record to update, we add the {id} route to it.
As we don't wish to return any data as part of the response, we can return a NoContentResult type. This will return a HTTP 204 No Content response.
[Route("api/[controller]")]
[ApiController]
public class ProductController : ControllerBase
{
	...

	[HttpPut("{id}")]
	public IActionResult Update(int id, WeatherForecast weatherForecast)
	{
		return NoContent();
	}
}
Deleting an entity
Finally, deleting an entity will involve using the HttpDelete attribute, and passing in the {id} route as part of the template parameter.
Once again, we don't wish to return any data as part of the response, so we can return a NoContentResult type. This will return a HTTP 204 No Content response.
[Route("api/[controller]")]
[ApiController]
public class ProductController : ControllerBase
{
	...

	[HttpDelete("{id}")]
	public IActionResult Delete(int id)
	{
		return NoContent();
	}
}
How the controller looks
The code for the ProductController will look like this:
// ProductController.cs
[Route("api/[controller]")]
[ApiController]
public class ProductController : ControllerBase
{
    [HttpGet("{id}")]
    public IActionResult Read(int id)
    {
        return Ok(new { id, Name = "Dave" });
    }

    [HttpPost]
    public IActionResult Create(WeatherForecast weatherForecast)
    {
        return Created(string.Empty, weatherForecast);
    }

    [HttpPut("{id}")]
    public IActionResult Update(int id, WeatherForecast weatherForecast)
    {
        return NoContent();
    }

    [HttpDelete("{id}")]
    public IActionResult Delete(int id)
    {
        return NoContent();
    }
}
To learn how to use Entity Framework in an ASP.NET Core Web API, check out our six-part video tutorial on how to Get Started with EF Core.
How to test in Postman
Running the project in Visual Studio will allow you to test the project using Swagger. But what if you want to use Postman?
Postman is an API platform for building an using API's. It's perfect for testing Web API functionality.
Watch our video where not only do we guide you through how to set up API endpoints, we also talk through the steps on how to install and test in Postman.
In-addition, download the code example where you can try out each of the endpoints yourself.
Related tutorials

