.NET 10: What are the steps to update your project?
Published: Friday 14 November 2025
.NET 10 is finally here!
Update Visual Studio
Updating Visual Studio 2022
Visual Studio 2022 received an update on the .NET 10 launch day - but it was only a patch release.
Introducing Visual Studio 2026
That's because there's a new major version of Visual Studio.
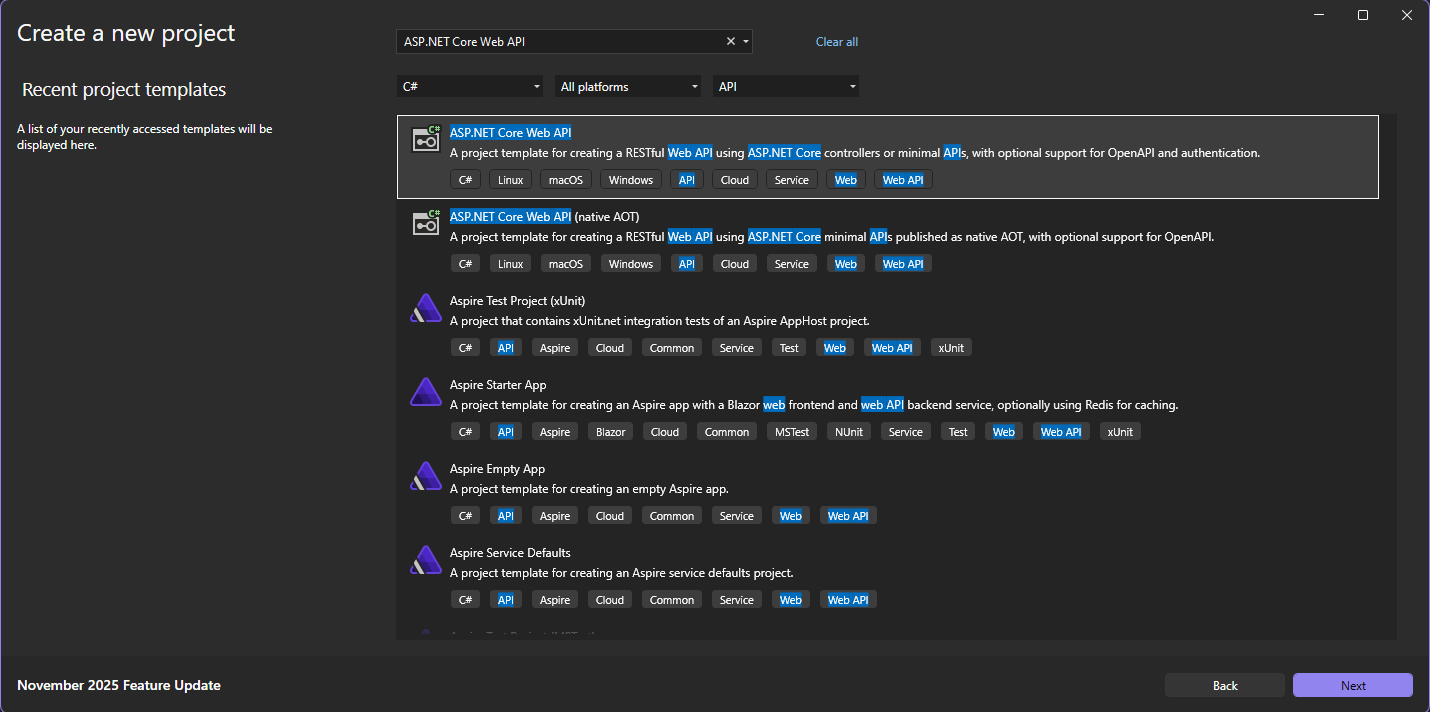
Create an ASP.NET Core Web API in Visual Studio 2026
Download the .NET 10 SDK
Installing Visual Studio should download the .NET 10 SDK. Open up a terminal window and run this command to confirm that:
dotnet --list-sdksThis will give you a list of all the .NET SDK's installed on your machine. If any of the versions start with 10., then .NET 10 is installed.
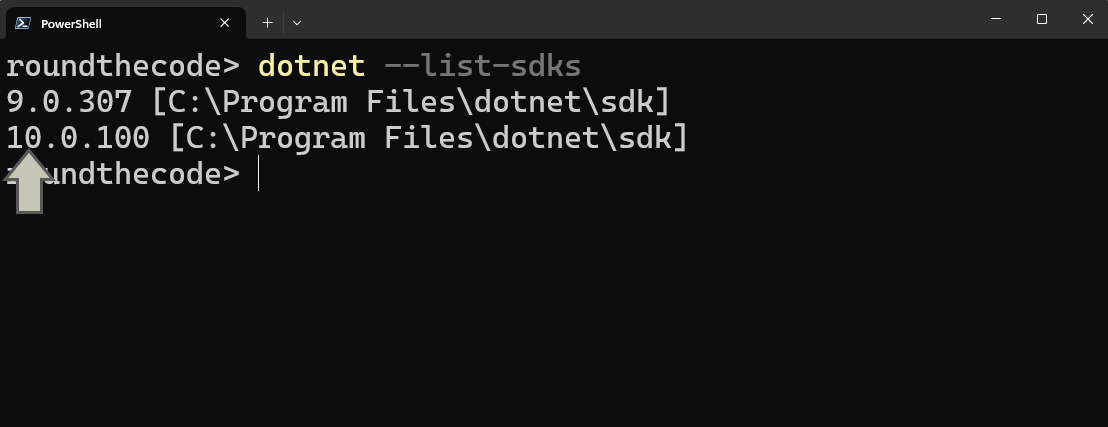
Using a Terminal window to see what .NET SDK's are installed
Linux and Mac users
If the .NET 10 SDK is not installed, or you are using a different IDE, or running on Linux or Mac, then you'll need to download the .NET 10 SDK. Make sure that you download the correct version for your machine and that you select the SDK and not the Runtime version.
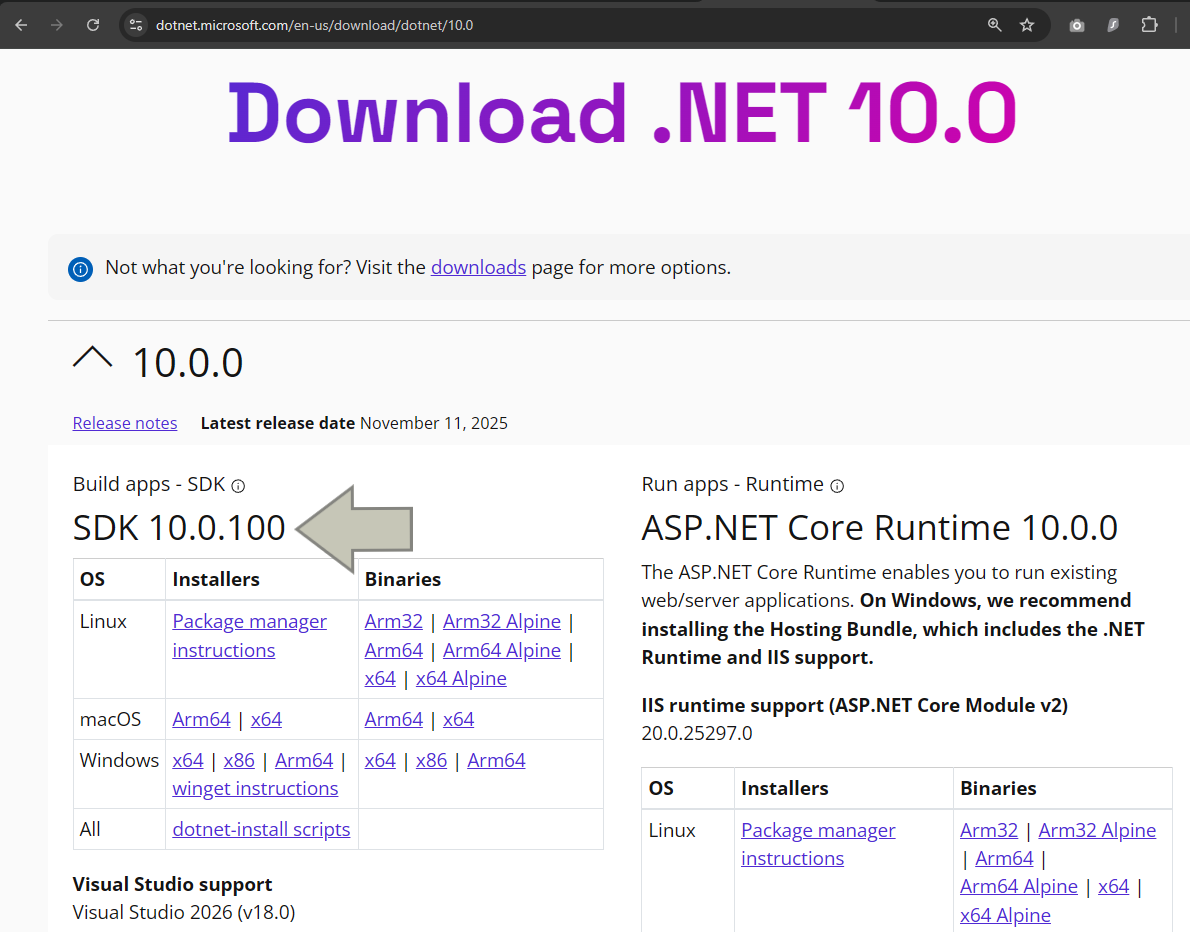
Download the .NET 10 SDK from the .NET website
Learn more
You can learn more about .NET 10 and Visual Studio 2026 by taking our Minimal API for complete beginners course. You'll use these tools to build a real application that incorporates clean architecture, Entity Framework Core with SQL Server, dependency injection, logging, authentication, and unit testing.
Updating projects
Now that you've installed the .NET 10 SDK, you can update your projects.
.csproj file for each of your projects, find the TargetFramework element and change it to net10.0.
<Project Sdk="Microsoft.NET.Sdk">

  <PropertyGroup>
    <OutputType>Exe</OutputType>
    <TargetFramework>net10.0</TargetFramework> <!-- <== Change it on this line -->
    <ImplicitUsings>enable</ImplicitUsings>
    <Nullable>enable</Nullable>
  </PropertyGroup>

</Project>
Update the NuGet packages
It's not just the projects you'll need to update. You'll have to update the NuGet packages as well. You can do that in Visual Studio by going to Tools, NuGet Package Manager and Manage NuGet Packages for Solution.... Click on the Update tab and see what packages need updating. Select the ones that you want to update and click on the Update button.
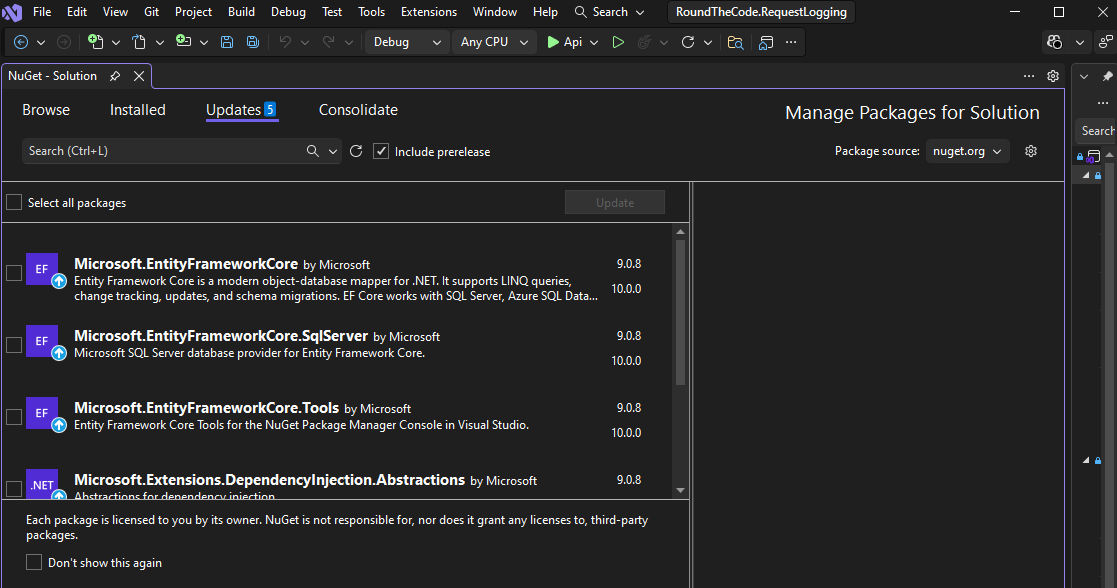
Update NuGet packages to their latest version
If you're not using Visual Studio, you can see which NuGet packages need updating by running the following command:
dotnet list package --outdatedThen you can run this command for each package that you want to update, replacing {PackageName} with the package you want to update:
dotnet add package {PackageName}Run the project
Once the version and packages are updated, build and run the project.
If it doesn't compile or run, it may mean that you need to address the breaking changes in .NET 10. Have a look at them to see if they are preventing your application from compiling.
Migrate Swagger to OpenAPI
In .NET 9, Microsoft dropped support for Swagger in favour of using OpenAPI documentation. That means if you use Swagger, you'll need to make some changes.
First of all, remove the Swashbuckle.AspNetCore NuGet package. Then install these NuGet packages:
Microsoft.AspNetCore.OpenApiSwashbuckle.AspNetCore.SwaggerUI
Then you'll need to update your Program.cs file by removing builder.Services.AddSwaggerGen(); and app.UseSwagger();. Then, replace it with the following:
// Program.cs
builder.Services.AddOpenApi();

...

if (app.Environment.IsDevelopment())
{
	app.MapOpenApi();
	app.UseSwaggerUI(options =>
	{
		options.SwaggerEndpoint("/openapi/v1.json", "Api v1");
	});
}
Make sure that the Swagger endpoint points to /openapi/v1.json.
Run the application and go to /swagger. Your Swagger documentation should now load.
Update the solution file
Visual Studio 2026 solution files use the .slnx extension. They are designed to be much more simple then the bloated .sln files used in VS 2022. Here is an example of a bloated .sln file:
Microsoft Visual Studio Solution File, Format Version 12.00
# Visual Studio Version 17
VisualStudioVersion = 17.12.35506.116 d17.12
MinimumVisualStudioVersion = 10.0.40219.1
Project("{FAE04EC0-301F-11D3-BF4B-00C04F79EFBC}") = "Api", "Api\Api.csproj", "{B1DC69A7-5A07-4E5F-8226-7132F47602F6}"
EndProject
Project("{FAE04EC0-301F-11D3-BF4B-00C04F79EFBC}") = "Application", "Application\Application.csproj", "{E3069A95-805C-4266-8387-FC5353380322}"
EndProject
Project("{FAE04EC0-301F-11D3-BF4B-00C04F79EFBC}") = "Infrastructure", "Infrastructure\Infrastructure.csproj", "{EC2E2538-F7EA-49E8-BE9D-541F7875540E}"
EndProject
Global
	GlobalSection(SolutionConfigurationPlatforms) = preSolution
		Debug|Any CPU = Debug|Any CPU
		Release|Any CPU = Release|Any CPU
	EndGlobalSection
	GlobalSection(ProjectConfigurationPlatforms) = postSolution
		{B1DC69A7-5A07-4E5F-8226-7132F47602F6}.Debug|Any CPU.ActiveCfg = Debug|Any CPU
		{B1DC69A7-5A07-4E5F-8226-7132F47602F6}.Debug|Any CPU.Build.0 = Debug|Any CPU
		{B1DC69A7-5A07-4E5F-8226-7132F47602F6}.Release|Any CPU.ActiveCfg = Release|Any CPU
		{B1DC69A7-5A07-4E5F-8226-7132F47602F6}.Release|Any CPU.Build.0 = Release|Any CPU
		{E3069A95-805C-4266-8387-FC5353380322}.Debug|Any CPU.ActiveCfg = Debug|Any CPU
		{E3069A95-805C-4266-8387-FC5353380322}.Debug|Any CPU.Build.0 = Debug|Any CPU
		{E3069A95-805C-4266-8387-FC5353380322}.Release|Any CPU.ActiveCfg = Release|Any CPU
		{E3069A95-805C-4266-8387-FC5353380322}.Release|Any CPU.Build.0 = Release|Any CPU
		{EC2E2538-F7EA-49E8-BE9D-541F7875540E}.Debug|Any CPU.ActiveCfg = Debug|Any CPU
		{EC2E2538-F7EA-49E8-BE9D-541F7875540E}.Debug|Any CPU.Build.0 = Debug|Any CPU
		{EC2E2538-F7EA-49E8-BE9D-541F7875540E}.Release|Any CPU.ActiveCfg = Release|Any CPU
		{EC2E2538-F7EA-49E8-BE9D-541F7875540E}.Release|Any CPU.Build.0 = Release|Any CPU
	EndGlobalSection
	GlobalSection(SolutionProperties) = preSolution
		HideSolutionNode = FALSE
	EndGlobalSection
EndGlobal
This can be simplified in a .slnx file. You just need to include the <Solution> tag and then populate the path for each of your projects using the <Project> tag. And make sure that you update your solution file to use the .slnx extension. Here is an example of how it would look:
<Solution>
  <Project Path="Api/Api.csproj" />
  <Project Path="Application/Application.csproj" />
  <Project Path="Infrastructure/Infrastructure.csproj" />
</Solution>
Visual Studio will populate an Id parameter if needed:
<Solution>
  <Project Path="Api/Api.csproj" />
  <Project Path="Application/Application.csproj" Id="5621f32e-84f7-47f5-9db7-faebeb7be7b0" />
  <Project Path="Infrastructure/Infrastructure.csproj" Id="247ab924-d64d-4c4b-a854-3d2371fd5997" />
</Solution>
Visual Studio 2026 is able to open up .sln files, but it looks a lot less bloated using the .slnx extension.
Updating the Dockerfile
If you are using Docker and you have a Dockerfile in your project, you'll need to update the .NET version to 10.0. In this example, we have set a DOTNET_VERSION argument to 10.0-alpine. The argument is then used to download the .NET 10 SDK for building the project and the ASP.NET Core 10 Runtime for running the project.
ARG DOTNET_VERSION=10.0-alpine # Updated to .NET 10
ARG BUILD_CONFIGURATION=Release

FROM mcr.microsoft.com/dotnet/sdk:${DOTNET_VERSION} AS build # Uses ${DOTNET_VERSION} argument

WORKDIR /src
COPY ["Api/", "Api/"]
COPY ["Application/", "Application/"]
COPY ["Infrastructure/", "Infrastructure/"]

WORKDIR /src/Api
RUN dotnet restore "./Api.csproj"
RUN dotnet build "./Api.csproj" -c "$BUILD_CONFIGURATION" -o /app/build

RUN dotnet publish "./Api.csproj" -c "$BUILD_CONFIGURATION" -o /app/publish -r linux-musl-x64

FROM mcr.microsoft.com/dotnet/aspnet:${DOTNET_VERSION} AS run # Uses ${DOTNET_VERSION} argument
WORKDIR /app

RUN apk add --no-cache krb5-libs
RUN apk add --no-cache icu-libs
ENV DOTNET_SYSTEM_GLOBALIZATION_INVARIANT=false

COPY --from=build /app/publish .
ENTRYPOINT [ "dotnet", "RoundTheCode.RequestLogging.Api.dll"]
You'll then need to build and run your Dockerfile to ensure that it's still working.
If you're new to Docker, read our tutorial on how to write a Dockerfile.
Watch the video
Watch this video where we show you the steps you need to go through to update your project to .NET 10:
C#14: New features
The .NET 10 release comes with a new release of C#. C# 14 has a number of new features that you can take advantage of when you start using .NET 10 in your projects.
Related pages
