Add a React app to your ASP.NET Core application
Published: Wednesday 15 January 2020
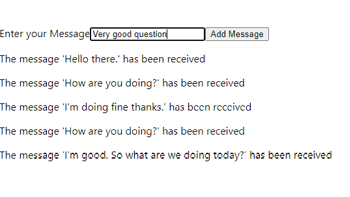
There are many benefits to adding a React application to your ASP.NET Core application. The fact that you can house your front-end React tools with your API .NET tools in one application has to be one of the biggest. So how do you go about doing it?
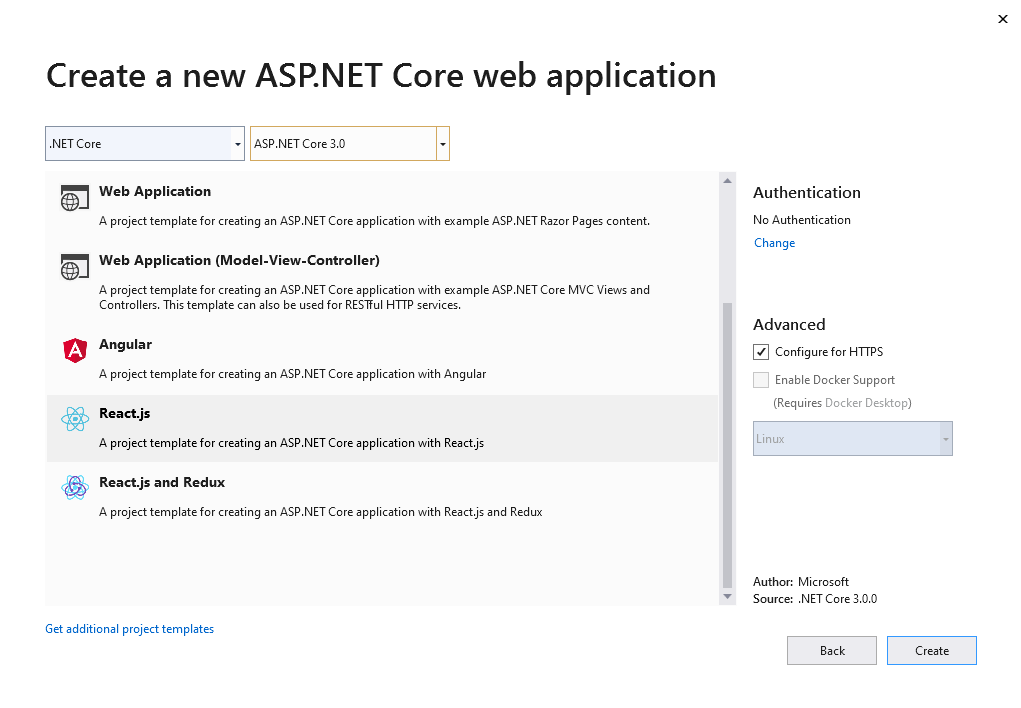
Well, if you have not created your React app yet, it's deadly easily. Creating a new project in Visual Studio gives you a project template to create a ASP.NET Core Web Application with React.js. Do the following tasks:
- Load up Visual Studio 2019 and select Create a new Project
- Select ASP.NET Core Web Application
- Give your project a name, location and solution name
- Select React.js
This will now create your ASP.NET Core application and your React application. Your React application will be housed inside the ClientApp folder. This is all you have to do to create your React app. The next stage is building your React app.
Changing the Folder Name of your React App
But, what if you want change the folder name of your React App? ClientApp might not be the best folder to house your React app in. Well, for that to happen, we need to analyse some of the files that Visual Studio created when it created our React .NET application.
Startup.cs
Your Startup.cs file will now include the Microsoft.AspNetCore.SpaServices assembly. SPA stands for Single-Page application in-case you didn't know and there are many methods from that assembly that are used.
// Startup.cs
using Microsoft.AspNetCore.Builder;
using Microsoft.AspNetCore.Hosting;
using Microsoft.AspNetCore.SpaServices.ReactDevelopmentServer;
using Microsoft.Extensions.Configuration;
using Microsoft.Extensions.DependencyInjection;
using Microsoft.Extensions.Hosting;

namespace React
{
	public class Startup
	{
		public Startup(IConfiguration configuration)
		{
			Configuration = configuration;
		}

		public IConfiguration Configuration { get; }

		// This method gets called by the runtime. Use this method to add services to the container.
		public void ConfigureServices(IServiceCollection services)
		{

			services.AddControllersWithViews();

			// In production, the React files will be served from this directory
			services.AddSpaStaticFiles(configuration =>
			{
				configuration.RootPath = "ClientApp/build";
			});
		}

		// This method gets called by the runtime. Use this method to configure the HTTP request pipeline.
		public void Configure(IApplicationBuilder app, IWebHostEnvironment env)
		{
			if (env.IsDevelopment())
			{
				app.UseDeveloperExceptionPage();
			}
			else
			{
				app.UseExceptionHandler("/Error");
				// The default HSTS value is 30 days. You may want to change this for production scenarios, see https://aka.ms/aspnetcore-hsts.
				app.UseHsts();
			}

			app.UseHttpsRedirection();
			app.UseStaticFiles();
			app.UseSpaStaticFiles();

			app.UseRouting();

			app.UseEndpoints(endpoints =>
			{
				endpoints.MapControllerRoute(
					name: "default",
					pattern: "{controller}/{action=Index}/{id?}");
			});

			app.UseSpa(spa =>
			{
				spa.Options.SourcePath = "ClientApp";

				if (env.IsDevelopment())
				{
					spa.UseReactDevelopmentServer(npmScript: "start");
				}
			});
		}
	}
}
Inside the Configure method, it uses the UseSpa from the IApplicationBuilder interface. The UseSpa sets the source path for your React app. As a result, if you wish to rename the folder name of your React app, you can change it here.
Additionally, this function allows you to run a React Development Server if you are developing your application. This starts up a separate server for your React app and allows you to run your React app and .NET Core app parallel with each other. All you have to do is call the UseReactDevelopmentServer method inside ISpaBuilder and supply a script name.
Production
But what if you are ready for production? For this, you will want your ASP.NET Core app to read off the React static files rather than firing off the React Development Server. First things first, you need to make sure you have Node.js installed on your machine. Open up your favourite command line, change the directory to your React app, making sure you are in the directory that contains the package.json file. Run the following commands:
npm install

npm run-script build
Of course if you have Yarn installed, you can replace "npm" with "yarn". Running these commands will create your static files by default in the build folder within your React App.
Going back to your Startup.cs file, inside the ConfigureServices method, you can call the AddSpaStaticFiles method from the IServiceCollection. This will configure where the static files for your React app reside.
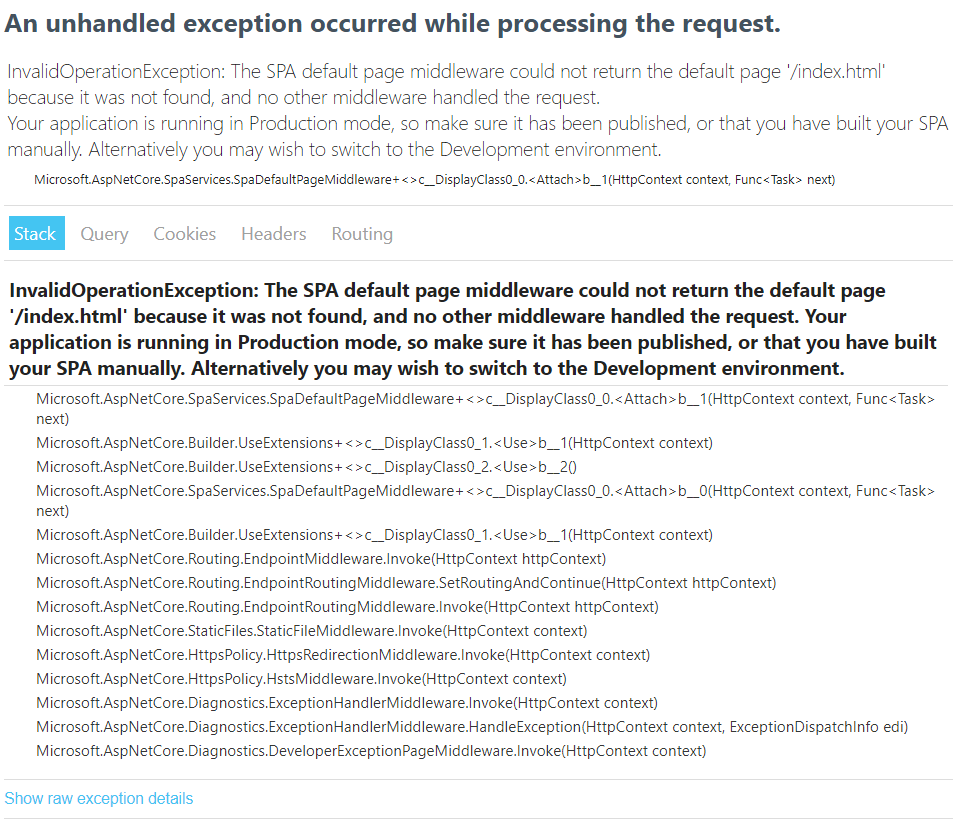
If you try to run your ASP.NET Core application in production mode and you have not ran your React build script, you will be greeted with a 500 error page. The error will look similar to this:
The .csproj File
So you still want to change the folder name of my React app and you've changed all the references to it in Startup.cs. Is that all you have to do? Not quite. You also need to change the reference inside the .csproj file.
<!-- React.csproj -->
<Project Sdk="Microsoft.NET.Sdk.Web">

	<PropertyGroup>
		<TargetFramework>netcoreapp3.0</TargetFramework>
		<TypeScriptCompileBlocked>true</TypeScriptCompileBlocked>
		<TypeScriptToolsVersion>Latest</TypeScriptToolsVersion>
		<IsPackable>false</IsPackable>
		<SpaRoot>ClientApp\</SpaRoot>
		<DefaultItemExcludes>$(DefaultItemExcludes);$(SpaRoot)node_modules\**</DefaultItemExcludes>
	</PropertyGroup>

	<ItemGroup>
		<PackageReference Include="Microsoft.AspNetCore.SpaServices.Extensions" Version="3.0.0" />
	</ItemGroup>

	<ItemGroup>
		<!-- Don't publish the SPA source files, but do show them in the project files list -->
		<Content Remove="$(SpaRoot)**" />
		<None Remove="$(SpaRoot)**" />
		<None Include="$(SpaRoot)**" Exclude="$(SpaRoot)node_modules\**" />
	</ItemGroup>

	<Target Name="DebugEnsureNodeEnv" BeforeTargets="Build" Condition=" '$(Configuration)' == 'Debug' And Exists('$(SpaRoot)node_modules') ">
		<!-- Ensure Node.js is installed -->
		<Exec Command="node --version" ContinueOnError="true">
		  <Output TaskParameter="ExitCode" PropertyName="ErrorCode" />
		</Exec>
		<Error Condition="'$(ErrorCode)' != '0'" Text="Node.js is required to build and run this project. To continue, please install Node.js from https://nodejs.org/, and then restart your command prompt or IDE." />
		<Message Importance="high" Text="Restoring dependencies using 'npm'. This may take several minutes..." />
		<Exec WorkingDirectory="$(SpaRoot)" Command="npm install" />
	</Target>

	<Target Name="PublishRunWebpack" AfterTargets="ComputeFilesToPublish">
		<!-- As part of publishing, ensure the JS resources are freshly built in production mode -->
		<Exec WorkingDirectory="$(SpaRoot)" Command="npm install" />
		<Exec WorkingDirectory="$(SpaRoot)" Command="npm run build" />

		<!-- Include the newly-built files in the publish output -->
		<ItemGroup>
			<DistFiles Include="$(SpaRoot)build\**" />
			<ResolvedFileToPublish Include="@(DistFiles->'%(FullPath)')" Exclude="@(ResolvedFileToPublish)">
				<RelativePath>%(DistFiles.Identity)</RelativePath>
				<CopyToPublishDirectory>PreserveNewest</CopyToPublishDirectory>
				<ExcludeFromSingleFile>true</ExcludeFromSingleFile>
			</ResolvedFileToPublish>
		</ItemGroup>
	</Target>

</Project>
Inside this file, a SpaRoot tag has been created inside the PropertyGroup tag. It's the value inside the SpaRoot tag that needs to be changed. This reference is used quite a lot inside the .csproj file, but you don't necessary need to know what it's doing. But you do need it to match the folder name of your React app otherwise your ASP.NET Core application will not run.
Importing an Existing React App
This is all very well if you are creating your React app from scratch, but what if you want to include an existing React app for your ASP.NET Core application? Well, it should just be a simple case of coping your React app into a folder inside your ASP.NET Core application. You will need to make sure that you copy your React app from the folder that contains the package.json file. It should be the case of making sure that the folder references match up in your Startup.cs and .csproj files.
Conclusion
That should be enough to get you going in-terms of being able to create your React app, build your API endpoints and then publish your ASP.NET Core application. It's worth noting that Single Page Applications like React are JavaScript heavy, so might not be the best route if your website relies on SEO. That is because search engines like Google have a rough time of reading pages that are generated through JavaScript. In that instance, you are better using off something like MVC.
Related tutorials