Use a .NET Worker Service to run background services
Worker Services were introduced in .NET Core 3.0, and allows for running background services through the use of a hosted service.
Another way of running background services is to run hosted services within an ASP.NET Core web application. However, if a hosted service has performance issues, it can affect the web application's stability.
A Worker Service is solely for tasks that run in the background. This means that it isn't tightly coupled with the web application. As a result, they are ideal if we have tasks that are CPU intensive, or running a task on a time-based schedule.
We'll show you how to create a Worker Service template in Visual Studio. In addition, we'll show you how to add a hosted service to the Worker Service template. Finally, we'll show you how to set up a Worker Service as a Windows service.
Create a Worker Service in Visual Studio
Creating a Worker Service in Visual Studio is relatively simple. As previously mentioned, there is a Worker Service template available in Visual Studio 2022.
Creating a new project and searching for Worker Service, we can see that it comes up.
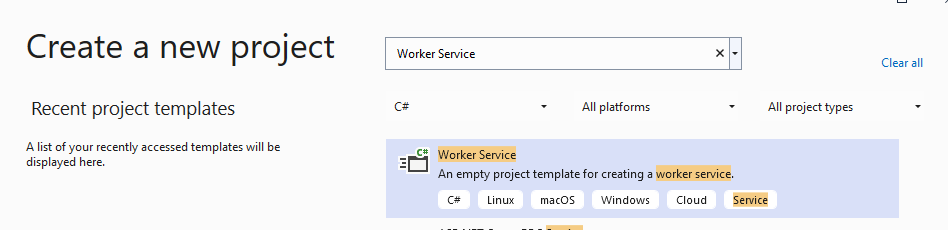
Once we have given the project a name and which framework to use, it goes ahead and creates our Worker Service.
The Worker Service uses the console template like ASP.NET Core. However, in the Program class, it runs an Host instance, rather than a WebApplication instance that runs ASP.NET Core.
When configuring the Host instance, there is an extension method called ConfigureServices. This is where we can add services for our application, like our hosted services, or any services we wish to use dependency injection.
Here is an example of how the Program.cs file looks in a Worker Service project in .NET 6.
// Program.cs
using RoundTheCode.WorkerServiceExample;

IHost host = Host.CreateDefaultBuilder(args)
	.ConfigureServices(services =>
	{
		services.AddHostedService<Worker>();
	})
	.Build();

await host.RunAsync();
If we were to run the Worker Service in Visual Studio, it would load up a console application and output any logger information written to the ILogger instance.
How to create a hosted service
A Worker Service can run many hosted services. If we use the Worker Service template in Visual Studio, it creates a hosted service called Worker.
The Worker hosted service outputs the current time to the logger instance. Then it sleeps the task for a minute before repeating the task. The task is repeated until the cancellation token is requested.
namespace RoundTheCode.WorkerServiceExample
{
	public class Worker : BackgroundService
	{
		private readonly ILogger<Worker> _logger;

		public Worker(ILogger<Worker> logger)
		{
			_logger = logger;
		}

		protected override async Task ExecuteAsync(CancellationToken stoppingToken)
		{
			while (!stoppingToken.IsCancellationRequested)
			{
				_logger.LogInformation("Worker running at: {time}", DateTimeOffset.Now);
				await Task.Delay(1000, stoppingToken);
			}
		}
	}
}
The hosted service inherits the BackgroundService abstract class, which inherits the IHostedService interface. The BackgroundService class has an ExecuteAsync abstract method. As it's abstract, that must mean that we have to override it in our hosted service.
Hosted services are added a singleton service. When it comes to dependency injection, we can inject singleton and transient service lifetime classes from the constructor.
If we wish to use a scoped service lifetime class, we need to define a custom scope, and inject the scoped service lifetime class from our custom scope.
Using a Worker Service as a Windows Service
One of the brilliant things with Worker Service's is that the fact they can be set up as a Windows Service. As a result, they can be running in the background on a system. In addition, they can also be setup to start automatically when the system is booted up.
To set up the Worker Service as a Windows Service, we first need to install the Microsoft.Extensions.Hosting.WindowsServices package from Nuget into our Worker Service project.
This provides an extension method called UseWindowsServices. We can apply this extension method to our Host instance in our Program class.
// Program.cs
using RoundTheCode.WorkerServiceExample;

IHost host = Host.CreateDefaultBuilder(args)
	.ConfigureServices(services =>
	{
		services.AddHostedService<Worker>();
	})
	.UseWindowsService()
	.Build();

await host.RunAsync();
Now that we've set up our Worker Service to use Windows Service, we need to go ahead and publish the project.
For this example, we are going to publish the Worker Service to a folder.
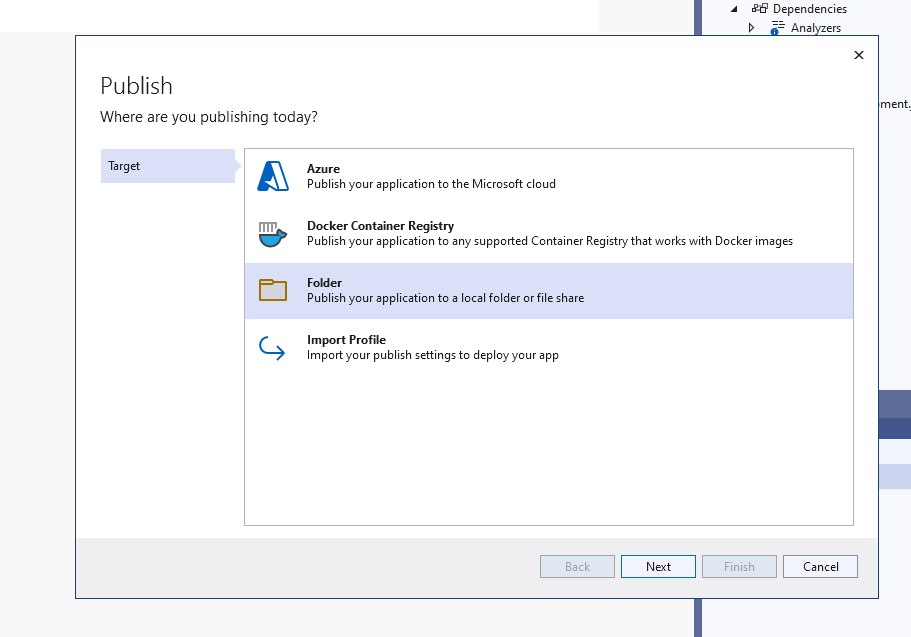
We go through the steps and set the location as to where we want to publish the Worker Service.
Once we've published our Worker Service, the final part is to set it up as a Windows Service.
To do this, we need to make a note of the folder location and the executable to where we published the Worker Service. Then, we open up Command Prompt (in administration mode) and run the following command:
sc create {WindowsServiceName} binpath="{FullPathToExeFile}" start="demand" displayname="{DisplayName}"

// {WindowsServiceName} = Unique identifier of the Windows Service. // e.g. WorkerServiceExample
// {WindowsServiceName} = A custom name for our Windows Service
// {FullPathToExeFile} = The full path to where the executable (.exe) file of our published Worker Service project
// {DisplayName} = A friendly name for our Windows Service // e.g. Worker Service Example
If we wish to add a description for our Windows Service, we need to run an sc description command in the command prompt:
sc description {WindowsServiceName} "This is a worker service example"

// {WindowsServiceName} = Unique identifier of the Windows Service. // e.g. WorkerServiceExample
To run the Windows Service, we can either load up the Services app and start the service from there. Or, in a command prompt, we can run the following command:
sc start {WindowsServiceName}

// {WindowsServiceName} = Unique identifier of the Windows Service. // e.g. WorkerServiceExample
To stop a Windows Service, we can do it either in the Services app, or run the following command prompt:
sc stop {WindowsServiceName}

// {WindowsServiceName} = Unique identifier of the Windows Service. // e.g. WorkerServiceExample
And there we go. We've managed to set up a Worker Service as a Windows Service.
See how to create a Worker Service
Watch our video where we demonstrate how to create a .NET Worker Service in Visual Studio and how to use it as a Window Service.
In addition, download the code example for a Worker Service example.
Don't forget about logging
As Worker Services run background services, it's important to include logging within the background tasks.
This is so we know that the task is running, and to make it easier to debug a task if it has performance issues.
Using the ILogger interface is a good way of implementing logging as it can be written to many logging provider's.
A logging provider could log the output to text files. Check out our tutorial on how to create a logging provider to log to text files in .NET.
Related pages
