Can Claude Code build a .NET app with your code style?
Published: Monday 22 June 2026
It's important to build a .NET project using your code style. But can Claude Code follow it?
Start with a spec file
Before you run Claude Code, create a Microsoft Word document with your specifications. Think of it as the brief you would hand to a developer joining your team.
At a minimum, this file should include:
The .NET and C# versions you are targeting
The architecture you want to use, such as clean architecture
The projects you want created, with a description of what belongs in each one
The endpoints you want included
The database schema
You can then upload it to an AI tool and ask it to check for any discrepancies or gaps. It will likely come back with suggestions. Work through those, repeat the process, and once you are happy with the content, ask the AI to generate a markdown version named spec.md.
You can then add spec.md into the root of your project, and this is the file that Claude Code will read from.
We used this approach to build a currency converter in an ASP.NET Core Web API. The spec told Claude Code which projects to create, how they should be structured, and what endpoints to expose.
Here is the prompt we gave to Claude Code to create the project:
Read spec.md and build the project according to the specification.
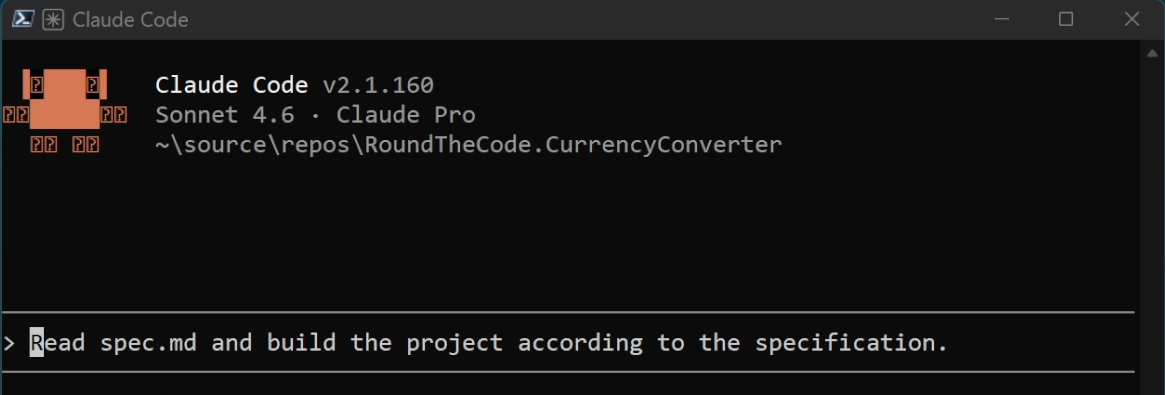
The prompt that we used for Claude Code to read the spec and create the .NET project
Reviewing the output in Visual Studio
Once Claude Code has finished, open the project in Visual Studio and check that it builds. Then look around the code to make sure it has followed the structure you specified. In our case, we asked for clean architecture, and it created the expected projects. If you have unit tests, run them too to confirm they all pass.
Using a database
If your project uses a database, be specific about how you want migrations handled. In our experience, Claude Code struggles to add and run Entity Framework Core migrations itself. The better approach is to ask it to install the relevant NuGet packages and provide instructions for adding the migration yourself, rather than attempting to run it.
Add the migrations manually, then open appsettings.json and confirm the connection string is correct before updating the database.
Testing the endpoints
With the migration applied, run the project and test your endpoints to ensure they are running successfully. If they're not, go back to Claude to make the necessary changes.
Permissions
During the build process, Claude Code will ask for permission before creating files or fetching content. This keeps you in full control of what it does. However, for a large project it can slow things down considerably, so you may want to override it. The Claude Code documentation lists the available permission modes. To skip all prompts entirely, you can use the --dangerously-skip-permissions flag when launching Claude. Be aware that this hands Claude Code full control, so use it accordingly.
Adding new features with CLAUDE.md
Once the project is built, you will want to make changes over time. The way to handle this is with a CLAUDE.md file in the root of your project. This is a file that details everything about your project that Claude Code will read every time it makes a change. As a result, you should mention that this file needs to be created in your spec file.
When asking Claude Code to add a new feature, give it as much detail as possible so it knows what it needs to add.
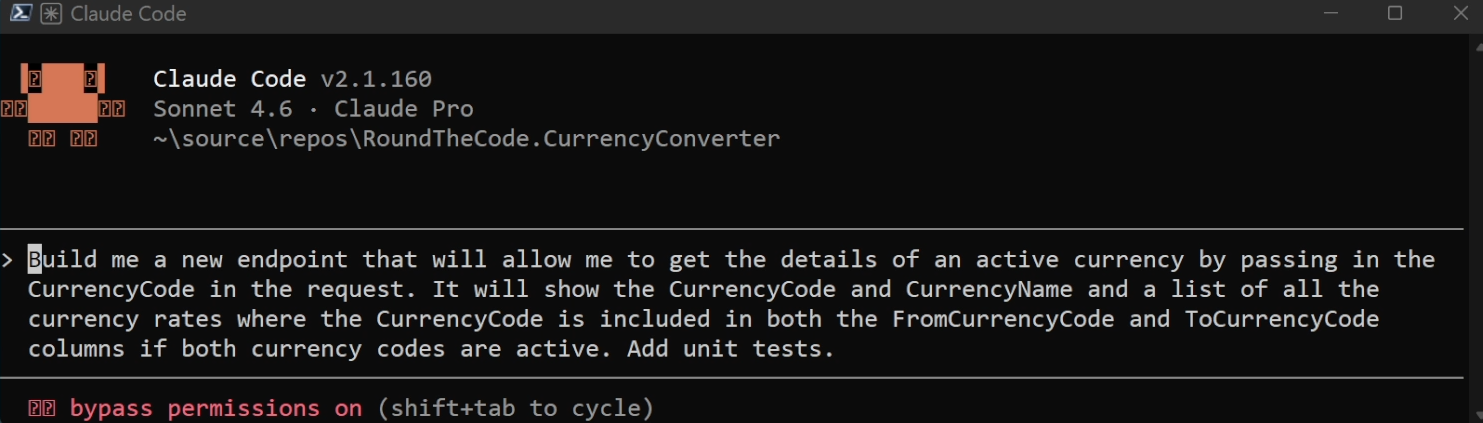
The prompt we gave Claude Code to add a new endpoint
After making a change, Claude Code should make the change and update CLAUDE.md to document what was added. You can update it yourself too, and it is worth doing so to keep it accurate for any future changes.
Installation
Installation is a single script and works on Windows, Mac, and Linux. On Windows, either PowerShell or CMD will do the job. If after installing you get a message saying the command is not recognised, add the install folder to your user path in environment variables, then restart the terminal.
Once installed, change directory to your project folder and type claude to launch it. You will be prompted to log in with your account or use API billing. Once logged in, you are ready to go.
Pricing
Everyone will need at least a Pro account to use Claude Code. If you are an individual developer new to Claude, the Pro account is the right starting point. If you find yourself hitting limits, you can upgrade to the Max account. For teams or enterprises with multiple developers, there are separate plans available.
Bringing Claude Code into your IDE
Switching between your IDE and the terminal all day is not ideal. At the time of writing, Visual Studio does not have an official Claude Code extension, but there is a well-regarded unofficial one. You can install it by going to Extensions > Manage Extensions and searching for Claude Code. Restart Visual Studio once it has installed, then go to View > Other Windows, and you should see the Claude Code panel. Add your prompt at the top and use it the same way you would in the terminal.
If you use Visual Studio Code, there is an official Claude Code extension available. Once installed, it runs alongside your project in the editor, making the workflow considerably smoother.
Watch the video
Watch the video where we show you the steps to create a .NET application using Claude Code from a spec file.
Related articles

