

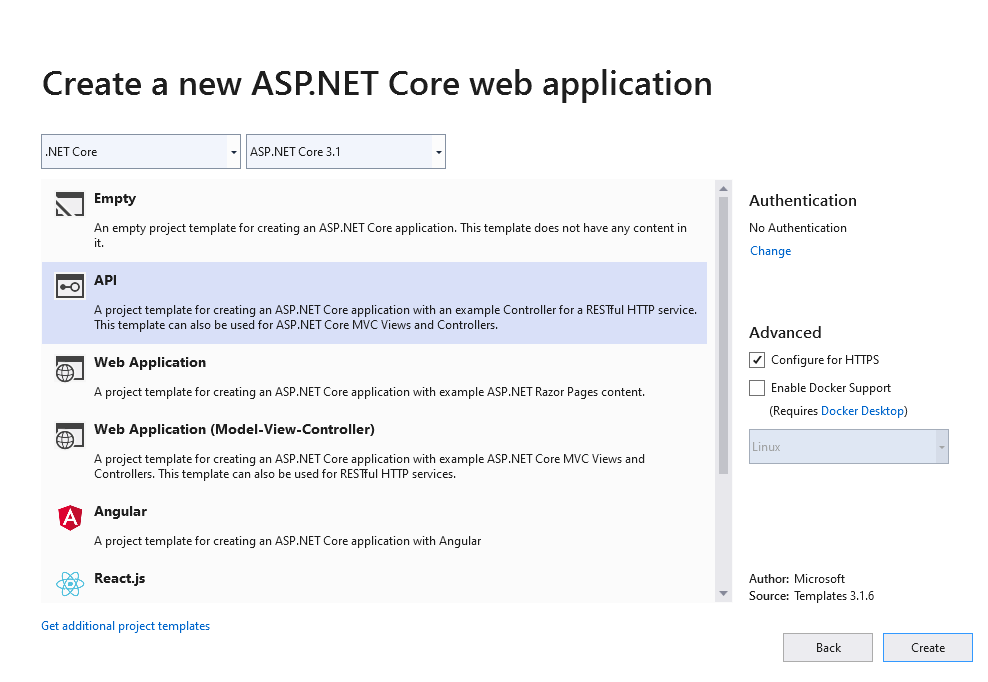
This enabled us to create the React app using TypeScript. The React app will be created inside the "clientapp" folder.
ASP.NET Core Configurations
Now that we have created both applications, we need to make some configuration changes to our ASP.NET Core application. But first, we need to install the following NuGet packages into our ASP.NET Core application:
- Microsoft.AspNetCore.SpaServices
- Microsoft.AspNetCore.SpaServices.Extensions
From there, we can open up our Startup class and make the configuration changes necessary.
Inside the ConfigureServices method, add the following line of code:
// Startup.cs
services.AddSpaStaticFiles(configuration =>
{
	configuration.RootPath = "ClientApp/build";
});
This will point the root path to the build folder for our React app.
Next, we need to add the following lines of code at the bottom of the Configure method:
// Startup.cs
app.UseSpa(spa =>
{
	spa.Options.SourcePath = "ClientApp";
	if (env.IsDevelopment())
	{
		spa.UseReactDevelopmentServer(npmScript: "start");
	}
});
This points the source path to our React app. In addition, it allows us to run the React Development Server when in Development. So, when we make a change in React, the React application is automatically rebuilt without having to restart the ASP.NET Core application.
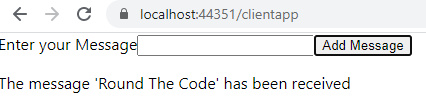
It's worth checking at this stage that your ASP.NET Core is integrated properly with React. Run the application to check. The React app should reside in https://localhost:{port}/clientapp.
SignalR Integration
Assuming your application is running fine, it's time to integrate SignalR. SignalR needs to be integrated in both the ASP.NET Core and React applications.
React
Firstly, we will integrate SignalR into our React app by running acommand line in the terminal in Visual Studio Code. Just make sure that you are pointing to the "clientapp" folder.
CD [PathToASPNETCoreApp]/clientappThen you can run this command line to install SignalR into React:
yarn add @microsoft/signalrASP.NET Core Integration
Next, we need to integrate it into our ASP.NET Core application. You will need to add the following NuGet package in-order to do this:
- Microsoft.AspNetCore.SignalR.Client
From there, we need to make a change in our Startup class. Inside the ConfigureServices method, add the following:
services.AddSignalR();Now, we have to create a new SignalR Hub which is very straight forward. Create a new class called MessageHub. We need to ensure that this class inherits the Hub class.
// MessageHub.cs
public class MessageHub : Hub
{
}
Finally, we need to map our hub to a route. The React app will use this route to connect to the right hub. Back in the Startup class, and the Configure method, there should be a app.UseEndPoints method. Add the following code to the top of this method:
endpoints.MapHub<MessageHub>("/message");This routes the MessageHub to /message.
API Endpoint
We need to create an endpoint where we can fire our messages to. For this, we have created a MessageController. The MessageController will route to /api/message. Inside this controller, we will integrate a Create method which will accept a HTTP Post verb.
The Create method will have a parameter of MessagePost. Inside the MessagePost, there will be a Message property. When we send the payload over to this action, we will send it as JSON. Inside the JSON, there will be a Message key. This Message key will bind with the Message property in the MessagePost class.
Inside the Create method, we use the MessageHub to send a message to all clients connected through SignalR. The MessageHub is injected through dependency injection through the IHubContext interface. Clients can hook into a virtual "sendToReact" method that will triggered when we invoke it.
// MessageController.cs
[Route("/api/message")]
[ApiController]
public class MessageController : Controller
{
protected readonly IHubContext<MessageHub> _messageHub;
public MessageController([NotNull] IHubContext<MessageHub> messageHub)
{
_messageHub = messageHub;
}
[HttpPost]
public async Task<IActionResult> Create(MessagePost messagePost)
{
await _messageHub.Clients.All.SendAsync("sendToReact", "The message '" +
messagePost.Message + "' has been received");
return Ok();
}
}
public class MessagePost
{
public virtual string Message { get; set; }
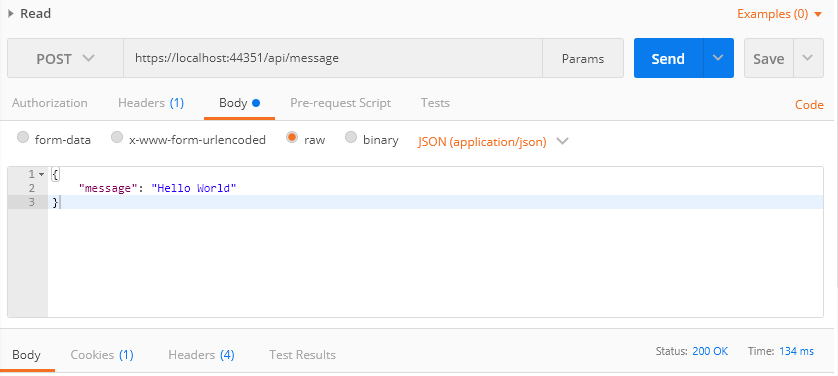
}It's worth at this point testing this method in Postman to check that you are getting a 200 response: