Next, we don't wish to publish the React SPA contained in the ASP.NET Core application. That's because we are going to build the React SPA separately. We don't want the TypeScript files included in our published solution. So, we need to exclude these files from publishing, but still need to list them, excluding the node_modules folder.
<!-- RoundTheCode.ReactSignalR.csproj -->
<ItemGroup>
	<Content Remove="$(SpaRoot)**" />
	<None Remove="$(SpaRoot)**" />
	<None Include="$(SpaRoot)**" Exclude="$(SpaRoot)node_modules\**" />
</ItemGroup>
After that, we need to focus on what happens when building the application. We need to make sure that NodeJS is installed. And when NodeJS is installed, it runs an "npm install" command to download all the modules required.
Now, this comes as the default if you create an ASP.NET Core app with the React Visual Studio template. However, one of the conditions for this rule is that it only runs if the "node_modules" folder doesn't exist. But that may cause an issue if you were to add a new module to your React application. Something to bare in mind.
<!-- RoundTheCode.ReactSignalR.csproj -->
<Target Name="DebugEnsureNodeEnv" BeforeTargets="Build" Condition="'$(Configuration)' == 'Debug' And !Exists('$(SpaRoot)node_modules') ">
	<!-- Ensure Node.js is installed -->
	<Exec Command="node --version" ContinueOnError="true">
		<Output TaskParameter="ExitCode" PropertyName="ErrorCode" />
	</Exec>

	<Error Condition="'$(ErrorCode)' != '0'" Text="Node.js is required to build and run this project. To continue, please install Node.js from https://nodejs.org/, and then restart your command prompt or IDE." />

	<Message Importance="high" Text="Restoring dependencies using 'npm'. This may take several minutes..." />

	<Exec WorkingDirectory="$(SpaRoot)" Command="npm install" />
</Target>
Lastly, when publishing, we need to be able to build our React SPA. So, we run a couple of commands.
- "npm install" - Installs the NodeJS modules
- "yarn build:iis" - Builds the React app. We will set up the "build:iis" part in a bit
We also need to include the built files from our React SPA into our published ASP.NET Core application.
<!-- RoundTheCode.ReactSignalR.csproj -->
<Target Name="PublishRunWebpack" AfterTargets="ComputeFilesToPublish">
	<!-- As part of publishing, ensure the JS resources are freshly built in production mode -->
	<Exec WorkingDirectory="$(SpaRoot)" Command="npm install" />
	<Exec WorkingDirectory="$(SpaRoot)" Command="yarn build:iis" />

	<!-- Include the newly-built files in the publish output -->
	<ItemGroup>
		<DistFiles Include="$(SpaRoot)build\**" />
		<ResolvedFileToPublish Include="@(DistFiles->'%(FullPath)')" Exclude="@(ResolvedFileToPublish)">
		<RelativePath>%(DistFiles.Identity)</RelativePath>
		<CopyToPublishDirectory>PreserveNewest</CopyToPublishDirectory>
		<ExcludeFromSingleFile>true</ExcludeFromSingleFile>
		</ResolvedFileToPublish>
	</ItemGroup>
</Target>
So, the full RoundTheCode.ReactSignalR.csproj file:
<!-- RoundTheCode.ReactSignalR.csproj -->
<Project Sdk="Microsoft.NET.Sdk.Web">

	<PropertyGroup>
		<TargetFramework>netcoreapp3.1</TargetFramework>
		<TypeScriptCompileBlocked>true</TypeScriptCompileBlocked>
		<TypeScriptToolsVersion>Latest</TypeScriptToolsVersion>
		<IsPackable>false</IsPackable>
		<SpaRoot>clientapp\</SpaRoot>
		<DefaultItemExcludes>$(DefaultItemExcludes);$(SpaRoot)node_modules\**</DefaultItemExcludes>
	</PropertyGroup>

	<ItemGroup>
		<PackageReference Include="Microsoft.AspNetCore.SignalR.Client" Version="3.1.5" />
		<PackageReference Include="Microsoft.AspNetCore.SpaServices" Version="3.1.5" />
		<PackageReference Include="Microsoft.AspNetCore.SpaServices.Extensions" Version="3.1.5" />
	</ItemGroup>


	<ItemGroup>
		<!-- Don't publish the SPA source files, but do show them in the project files list -->
		<Content Remove="$(SpaRoot)**" />
		<None Remove="$(SpaRoot)**" />
		<None Include="$(SpaRoot)**" Exclude="$(SpaRoot)node_modules\**" />
	</ItemGroup>

	<Target Name="DebugEnsureNodeEnv" BeforeTargets="Build" Condition="'$(Configuration)' == 'Debug' And !Exists('$(SpaRoot)node_modules') ">

		<!-- Ensure Node.js is installed -->
		<Exec Command="node --version" ContinueOnError="true">
			<Output TaskParameter="ExitCode" PropertyName="ErrorCode" />
		</Exec>

		<Error Condition="'$(ErrorCode)' != '0'" Text="Node.js is required to build and run this project. To continue, please install Node.js from https://nodejs.org/, and then restart your command prompt or IDE." />
		<Message Importance="high" Text="Restoring dependencies using 'npm'. This may take several minutes..." />
		<Exec WorkingDirectory="$(SpaRoot)" Command="npm install" />
	</Target>

	<Target Name="PublishRunWebpack" AfterTargets="ComputeFilesToPublish">
		<!-- As part of publishing, ensure the JS resources are freshly built in production mode -->
		<Exec WorkingDirectory="$(SpaRoot)" Command="npm install" />
		<Exec WorkingDirectory="$(SpaRoot)" Command="yarn build:iis" />

		<!-- Include the newly-built files in the publish output -->
		<ItemGroup>
			<DistFiles Include="$(SpaRoot)build\**" />
			<ResolvedFileToPublish Include="@(DistFiles->'%(FullPath)')" Exclude="@(ResolvedFileToPublish)">
				<RelativePath>%(DistFiles.Identity)</RelativePath>
				<CopyToPublishDirectory>PreserveNewest</CopyToPublishDirectory>
				<ExcludeFromSingleFile>true</ExcludeFromSingleFile>
			</ResolvedFileToPublish>
		</ItemGroup>
	</Target>

</Project>
Creating an Environment in React
We want to set up a configuration in our React SPA to support our publishing from our ASP.NET Core application. So, for this, we are going to set up a new configuration for React. We are going to call it "iis".
The reason why we need to do this is we need to tell our React SPA where the static CSS and JavaScript files are going to be built to.
First, we need to create a file in the "clientapp" folder. Lets call it ".env.iis". Inside this, we need to specify the location of the PUBLIC_URL:
PUBLIC_URL=/clientapp/buildThen we need to install the "env-cmd" npm module. This allows us to use configuration files like the one above.
yarn add env-cmdIt also requires the "@babel/runtime" npm module which you can do by running the following command:
yarn add -W @babel/runtimeRemember that we specified a "yarn build:iis" command in our RoundTheCode.ReactSignalR.csproj file? Well, if we were to publish the ASP.NET Core application now, we would get an error. So, we need to set up the "build:iis" script within the package.json file in our React app. You need to specify it within the "scripts" key.
"scripts": {
...

"build:iis": "env-cmd -f .env.iis react-scripts build",

...
}
What the "build:iis" command does is that it uses the configuration options set in ".env.iis" and builds the React app.
Publishing the ASP.NET Core Application
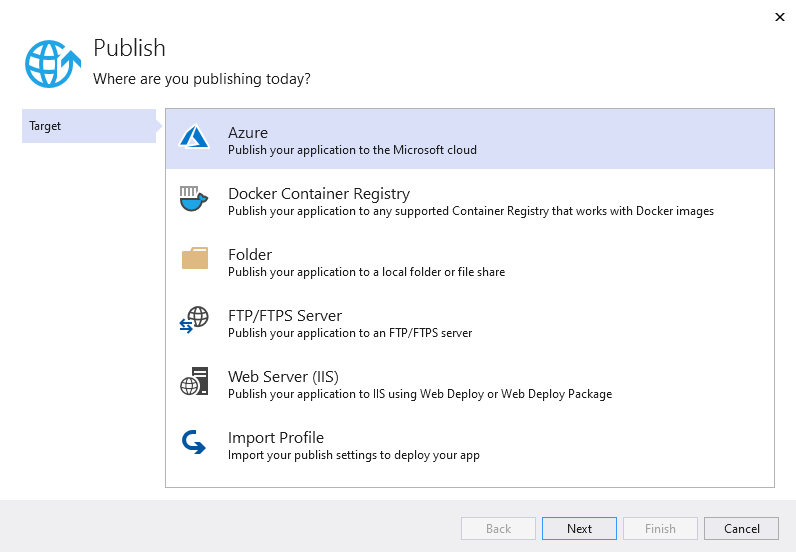
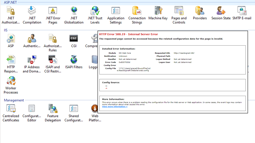
Now it's time to publish the application. In Visual Studio 2019, go the Build menu at the top and select the "Publish [Project].csproj" option.
You will be greeted with a menu similar to the following: